I am never one to back down from a challenge and when I realised it was my chocolate loving friends birthday I knew I had to push the boat out and make a real showstopper as bake-off would call it. My OH had recently bought me an icing set complete with all the bells and whistles and I knew this would be the perfect excuse to give it a whirl. This cake is a bit of a labour of love but it's a million percent worth it, delicate and light cake with perfectly chewy cookies and a decadent buttercream coating. What more could you want?
I have since made a 4 layer version of the cake (doubling up the ingredients) without the cookies for a my friends little ones birthday and you've never seen a bigger smile or a kid air punch about a cake so hard! This will take a good chunk of your day but I promise it's worth it. This recipe makes more cookies than are needed for the cake which is obviously such a shame! A real hardship to have to eat afterwards!
Ingredients:
For the cake:
230g plain flour
260g dark brown sugar
80g cocoa powder
1 tsp baking powder
1 tsp bicarbonate of soda
1 tsp cinnamon
2 tsp vanilla extract
150ml sunflower oil
360ml soy milk
1 1/2 tsp cider vinegar
For the cookies:
2 cups plain flour
1 tsp bicarbonate of soda
1 tsp baking powder
1 tsp salt
1 bar dark chocolate
1 tbsp cocoa powder
1/2 cup dark brown sugar
1/2 cup caster sugar
1/2 cup and 1 tbsp oil
1/4 cup and 1 tbsp water
1 tsp cinnamon
1 tsp vanilla extract
For the icing:
2 tbsp plant based butter
8 tbsp icing sugar
1 tbsp cocoa powder
1 tsp vanilla extract
1 bar dark chocolate
1 box mint chocolate squares (after eights - tesco own brand are vegan)
Method:
Start with the cake... Preheat your oven to 180c and grease two round cake tins (15cm across). Place the flour, sugar, cocoa powder, baking powder, bicarbonate of soda into a bowl and mix then slowly add in the vanilla extract and oil. In a separate jug, mix the soy milk and vinegar until the milk curdles slightly (trust me) and then add to the batter. Mix well with a beater to remove all the lumps, the batter should be smooth, glossy and relatively liquid. Separate evenly between the 2 cake tins and bake for 30-40 minutes until a skewer or knife comes out clean when inserted into the middle of the cake. Leave to cool in the tins for 5 minutes before turning onto a cooling rack.

While the cakes are baking, make the cookies. Pop the flour, bicarbonate of soda, baking powder, cinnamon, cocoa powder and salt into a bowl and mix together. Chop the bar of chocolate into small chunks and add to the dry ingredients. Place both sugars into a seperate bowl along with a the vanilla, water and oil and whisk together. Fold in the dry ingredients until everything comes together to form a stiff batter. I took generous teaspoons of the batter for smaller cookies, ideal for topping the cake. Make balls of the batter and place them on baking sheets lined with greaseproof paper then place in the freezer for at least half an hour.

By this time, your cakes should be out of the oven and the temperature can be lowered to 160c to bake the cookies. They will take around 15 minutes and should be soft to the touch but spread out and look puffy when baked. As they cool they will collapse and crack giving them the classic cookie look. Place the cookies onto a cooling tray as soon as you can touch them.
For the icing, place the butter into a blender along with the cocoa powder and the vanilla and blitz until the butter is creamy in consistency. Slowly add the icing sugar to prevent it flying everywhere. The icing should be quite thick but still spreadable, taste it at this stage to ensure it tastes of coca and sugar rather than butter and add more icing sugar if needed. Place in a box in the fridge until the cakes are fully cooled.

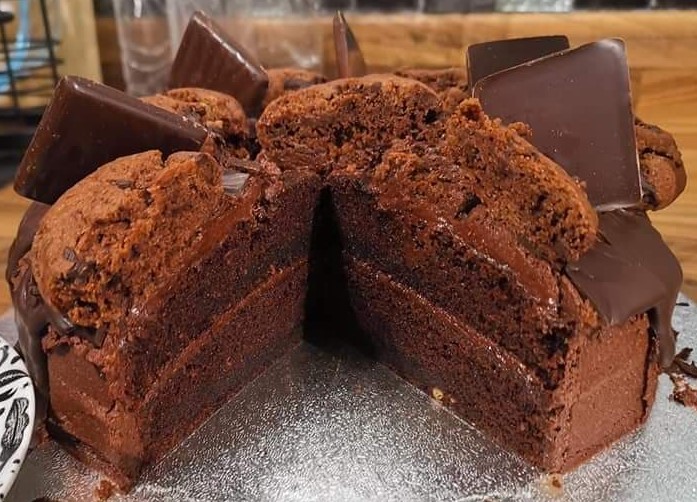
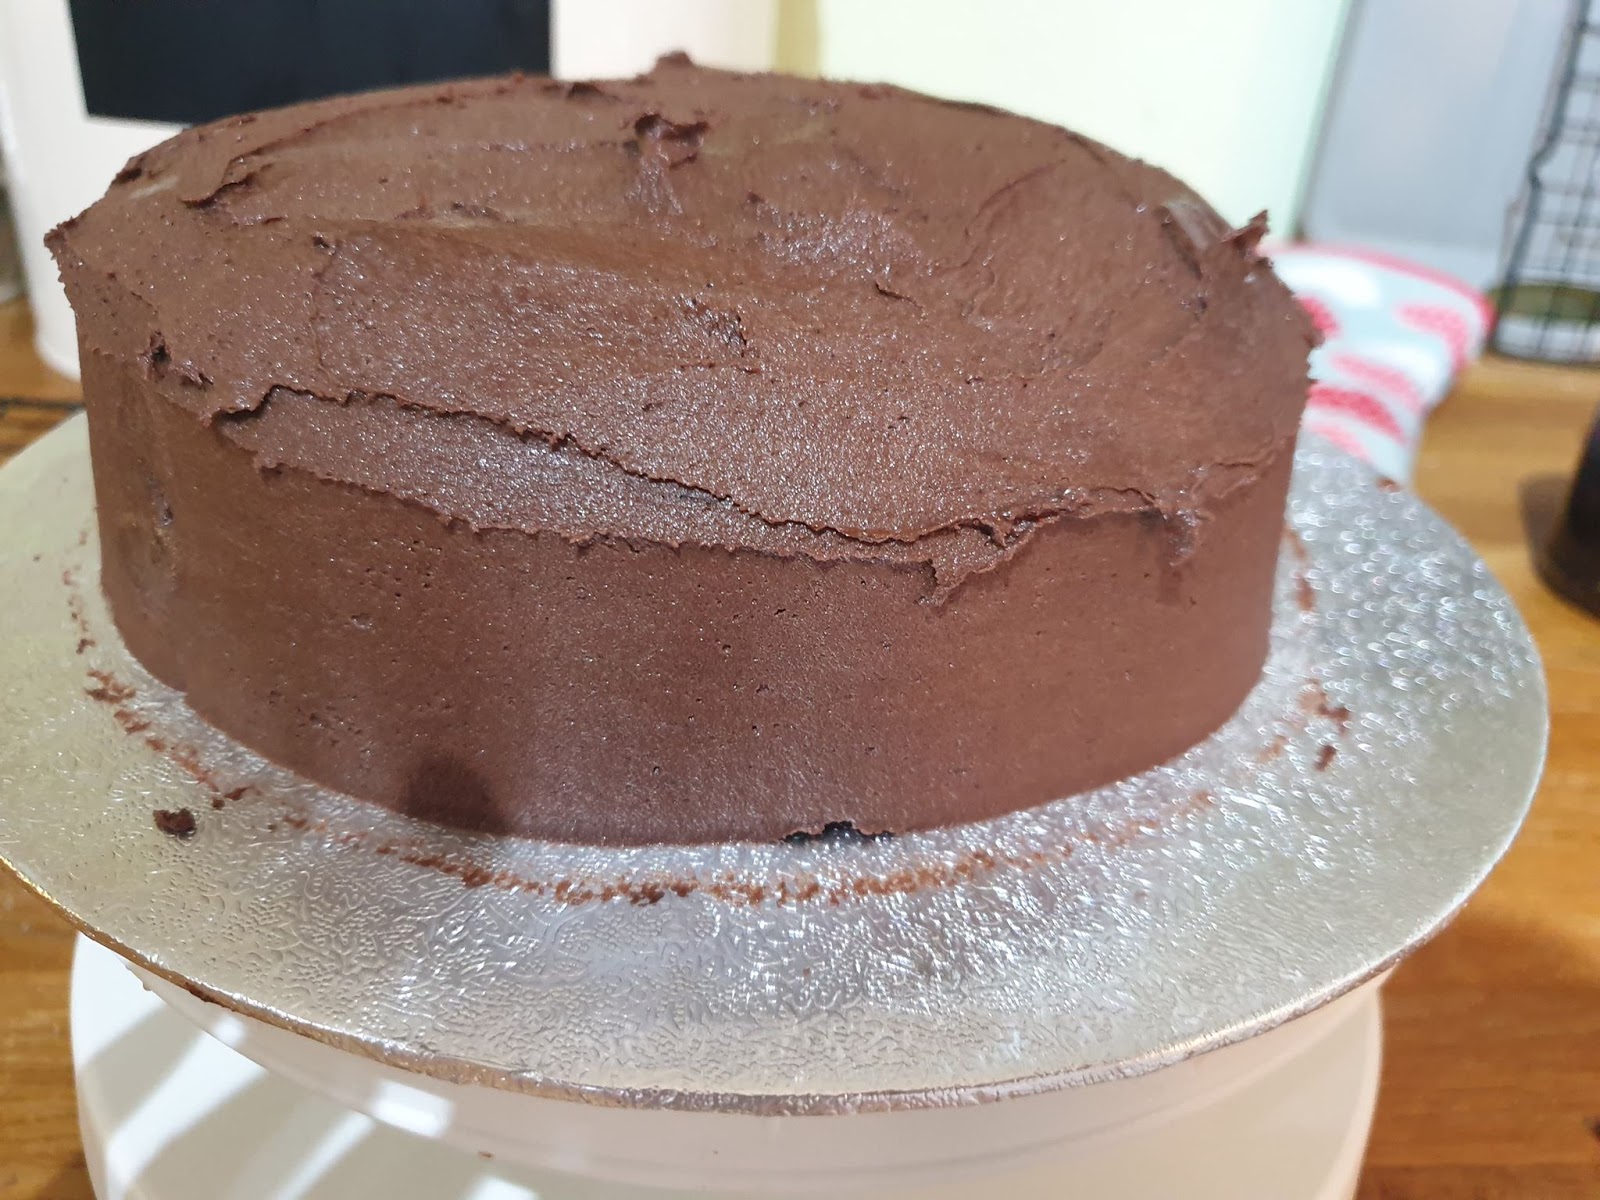
Once the cakes are fully cooled, place one on a serving plate or base. Take a mug and fill with hot water to aid the icing. I have a turntable and piping kit but if you don't just try and turn the cake around as often as possible to make the icing as smooth as you can. Place a tablespoon of the icing on top of the cake and smooth towards the edges, using either a palette knife or eating knife. If the icing starts to stick, dip the knife into the hot water to warm up as this helps to ease the icing around. Once the top of the cake is well covered, place the other cake on top. I then piped icing around the sides of the cake and smoothed with a scraper but you could also repeat the technique used for the middle of the cake although the results probably wont be as smooth. Once the sides of the cake are coated with icing, use the remainder on the top of the cake.

Take the remaining bar of chocolate and melt in the microwave in 30 second intervals until fully melted. Spoon over the top of the cake and encourage the melted chocolate to drip down the sides. Allow to set slightly before decorating with the cookies and mint chocolates. Place in the fridge to set fully before serving. Keep an eye on the cookies as one of mine kept making a nosedive off the edge of the cake.
When you make this, please take a picture and tag me using #diaryofadefectivehousewife.
Enjoy!