Sunday 31 December 2017

The Best Ginger Cake... EVER

I whipped up a batch of these to munch while ringing in the New Year, warming and sugary these hit the spot every time. Easy to make, these take around an hour from start to finish and can be made as cupcakes or a full cake. I'm currently all about individual portions of cake, like cupcakes as they are so easy to transport and even easier to eat!  This recipe is very moist and works well with gluten-free flour too. I tested this recipe on my wonderful friend Mhairi and in her words "OMFG! This is the best ginger cake ever" so get baking...


Ingredients:

For the cakes: 
200g self-raising flour
200g muscavado sugar 
1 tsp bicarbonate of soda
55g butter 
2 tsp ground ginger 
2 tbsp golden syrup 
240ml hot water 
1 egg
4 balls of ginger from a jar of ginger in syrup 

For the icing: 
55g butter 
220g icing sugar 
2 tbsp syrup from a jar of ginger in syrup
Crystallised ginger to decorate 


Method:

Preheat your oven to 180c and pop the kettle on to boil. In a food processor, blitz the balls of ginger until they become paste-like. Take a large bowl and add the flour and butter, rub together to combine until it forms breadcrumb-like bits. Add in the other dry ingredients and mix thoroughly. Add in the ginger paste, golden syrup and egg and mix again. Slowly add the boiling hot water mixing gently all the time to ensure everything combines. 

I made 12 cupcakes with this recipe, placing cupcake cases in a muffin tray for less spillage but this also makes 2 6in cakes, ideal for an indulgent treat. Place around 4 tbsp of batter in each cupcake case and bake for roughly 15 minutes until a skewer comes out clean. This mixture is quite sloppy so do be careful popping it in the oven. Once the cakes are baked, take them out of the tray and place on a wire rack to cool.  

Take the food processor again, I don't tend to rinse mine as little bits of ginger in the icing add to the flavour, and whizz together the butter and icing sugar until little crumbs are formed. Slowly add in the syrup until the mixture resembles whipped cream. 

Once the cakes are cooled, spread them generously with icing and top them with a few lumps of crystallised ginger. 


When you make these please tag me using #diaryofadefectivehousewife, I would love to see your creations.

Sunday 17 December 2017

Mince Pies

One of my all time favourites for the festive season, I decided to make my own mince pies from scratch this year. This recipe uses a generous amount of brandy which gives a gorgeous warmth to the pies but it could be swapped out for orange juice for a more child friendly recipe. These aren't difficult to make although they do require some organisation as the mincemeat needs to be left for a few days to soak. Perfect as an after dinner treat or with a mug of hot chocolate, these mince pies are a real winter warmer.


Ingredients:

For the mincemeat:
250g currants
250g mixed fruit
250g sultanas
100ml brandy
zest and juice of 1 lemon
300g butter
250g dark brown sugar
1 medium bramley cooking apple
1 tsp cinnamon
1 tsp ginger
1 tsp nutmeg

For the pastry:
225g plain flour
100g butter
3 tbsp water

Method 

Prepare the mincemeat at least 48 hours before you want to make the mince pies, if possible, the longer its left the better.

Place the currants, mixed fruit and sultanas in a bowl with the brandy, lemon juice and lemon zest and leave to soak for an hour. Melt the butter over a low heat. Grate the apple making sure to collect the juice. Add all the ingredients into the bowl and stir thoroughly making sure everything is well mixed together. Place the mince meat in air tight containers and leave to soak.


For the pastry, place the flour and butter in a large bowl and rub together between your thumb and fingers until it looks like bread crumbs. Add a water a little at a time until the dough comes together. Be careful at this point, if the dough is too wet it will stick to everything and leave a soggy bottom. Place the dough in a large freezer bag and kneed gently to ensure everything is brought together. I find this a great way to make sure it all sticks together without making a mess on the counter. Place in the fridge to chill for at least 15 minutes.

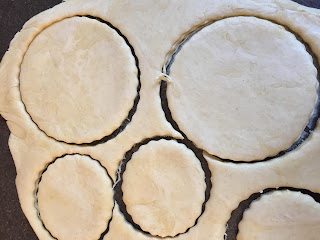
Preheat your oven to 180c. I used a muffin tin to make these as it makes a really nice size of mince pie. Add a little flour to the base of the muffin tray to prevent the pastry sticking. Take a two round cutters, one roughly the size of the muffin cups and one around 3cm larger.


Flour your work surface and rolling pin and roll out the pastry to roughly the 3mm in thickness. Turn the pastry while rolling to ensure an even roll and flip it over after the initial couple of rolls to prevent it sticking to the surface. Using the cutters, cut out an even number of each size to make the bases and lids. If you find the pastry sticks slightly, use a fish slice to lift it gently.

Place the larger circle of pastry into the muffin tray, pushing down gently with your finger to fit it into the tray. Take your mincemeat and give it a good mix. I used roughly 2 tsp of mincemeat per mince pie, I love them well filled. Place the smaller circle of dough over the top and use your fingers to gently bond the edges together. Repeat this process until you have used up the cut out dough, then ball up the scraps and repeat the rolling and cutting process until there is too little dough left to use.


Bake the mince pies for around 15-20 minutes until golden on top. Leave in the tins to cool for 10 minutes before turning out on to a wire rack. These will be incredibly hot inside so I would advise leaving them to cool a little, no matter how incredible they smell.


When you make these please take a picture and tag me using #diaryofadefectivehousewife


Sunday 10 December 2017

Ginger Biscuits

Another festive treat, these biscuits are easy to make and even easier to eat. The crisp biscuit combined with the warmth from the ginger and cinnamon makes these very satisfying to crunch your way through far to many. I used a medium shaped star cutter for these biscuits, any other shape of cutter can be used. I was also in a lazy mode and didn't ice these but I will include a simple icing recipe that can easily be drizzled over the top. Enjoy!


Ingredients:

For the biscuits:
350g plain flour, plus extra for rolling out
1 tsp bicarbonate of soda
4 tsp ground ginger
2 tsp cinnamon
125g butter
175g light brown sugar
1 egg
4 tbsp golden syrup

For the icing:
300g icing sugar
2 tbsp water - you may need more or less

Method:
Place the flour, bicarbonate of soda, ginger, cinnamon and butter in a food processor and pulse until it resembles bread crumbs (you can also rub it in by hand but this will take more time). Add in the sugar and mix again. Crack the egg into a bowl and add the golden syrup and beat together, I found this helps the golden syrup not to clump everything up. Add this in slowly mixing all the time. Once the dough has come together, place in a large freezer bag and kneed gently until it becomes smooth. Place the bag in the fridge for at least 20 minutes for the dough to set.

Preheat your oven to 180c fan. Take a large baking tray and dust lightly with flour. Lightly duct your work surface and rolling pin with flour and dip the cutting edge of the cutter in the flour as well to prevent the dough sticking. Take the dough from the fridge and flatten using your hands into a rough circle. Take the rolling pin and work from the centre out using gentle pressure, turning the dough with each roll and flipping the dough over a couple of times to ensure a smooth and even roll. Roll the dough to approximately 5mm thick.

Using your cutter, cut out as many biscuits as you can from the rolled out dough. Carefully peel the excess dough away and use a fish slice to remove the cut outs from the work surface and gently place them on the baking sheet, leaving around a 5mm gap between each as they expand when baked. Gather together the left over dough and gently kneed into a ball. Repeat the rolling out process until there is too little dough left to make anything.

Bake these biscuits for around 12 minutes until they are golden brown. They should still be slightly soft to the touch as they will harden as they cool. Place the tray of biscuits on a wire rack and leave to cool for 15-20 minutes. Remove the biscuits and place on the wire rack to finish cooling.

Once the biscuits are completely cool to touch, place the icing sugar in a bowl and gently mix in the water, a teaspoons worth at a time. Add water until the icing resembles double cream and coats the back of a spoon without dribbling off. Take a sandwich bag and put the icing inside. Cut off one of the bottom corners and use to drizzle the icing over the biscuits. You could also dip a spoon in the icing and drizzle it over.

These went down a real treat with my friends and family and are relatively simple to make. Please tag me using #diaryofadefectivehousewife when you bake these.

Sunday 3 December 2017

Chocolate and Cherry cupcakes

I made a version of this a few years ago and when thinking of ideas to make for the team at my other half work, I came up with these. The blend of chocolate and cherry is a total classic while the addition of a good dollop of stem ginger takes these cupcakes to another level. Relatively simple to make, these are a real showstopper.


Ingredients:

For the cupcakes:
6 oz self raising flour
6 oz caster sugar
6 oz butter
1 tsp baking powder
3 eggs
3 tbsp cocoa powder
3 balls of ginger in syrup

Additions and icing:
Cherry Jam
1oz butter
6 oz icing sugar
2 tbsp ginger syrup
1 tbsp cocoa powder
glace cherries to top


Method:

Preheat the oven to 160 fan. Prepare your cupcake cases in a tray, I use a muffin tray as there's less risk of spillage. Mince the ginger to a thick paste like consistency (I use a food processor) and place to one side. Use the food processor or a bowl and electric whisk (I prefer the electric whisk) to combine the cake ingredients together slowly before adding the ginger in at the end to prevent a sticky ball of mess. The mixture should resemble gently whipped cream in consistency when its done.

Spoon the mixture carefully into the cupcakes cases, I find around a tablespoon and a half is the perfect amount per case. Place in the oven and bake for 15 - 20 minutes until a skewer comes out clean. Place on a wire rack to cool.

Once the cupcakes have cooled, cut a dip in the centre using a sharp knife or a cupcake corer if you have one. Spoon in around a teaspoon of the cherry jam and pop the cake you cut out back on top. Blend the cocoa powder, icing sugar and butter together and slowly add the ginger syrup until the mixture comes together and resembles a thick cream in texture, you may need a little more or less of the syrup depending on the day. Either spread or pipe the icing onto the cupcakes and top with a glace cherry if you haven't scoffed them all before you use them. Glace cherries are a massive weakness of mine and I usually eat more than ends up in the bakes.

Leave these to set if you can possibly bear it and then scoff as many as possible. When you makes these, please tag me using #diaryofadefectivehousewife.


Monday 27 November 2017

Soup-er easy soup


This recipe is so easy and takes around 20 minutes from start to finish. The blend of ingredients tastes fresh and comforting all in one bowl, perfect for winter days when you need a pick me up at lunch.


Ingredients:
2 sweet potatoes
2 courgettes
2 inches fresh ginger
1 large onion
3 cloves of garlic
1 tbsp stock powder
Water to cover
2 tbsp olive oil

Method:

Place a large pan over a medium heat and pop the oil in the bottom to heat. Finely dice the onions, garlic and ginger and saute until the onions are soft and translucent. Peel and dice the sweet potatoes and chop the courgette to similar size pieces. Place in the pan and gently fry for a couple of minutes.

Add in the stock powder and enough hot water to cover the vegetables, making sure to stir thoroughly. Bring to the boil and simmer until the vegetables are soft. Blitz the soup using an immersion blender or a food processor and serve. Simples!

When you try this recipe, please take a picture and tag me using #diaryofadefectivehousewife. I'd love to see your creations.

Sunday 19 November 2017

Ratatouille and Sweet Potato Shepherdless Pie

Lots of people on vegan groups I below to have been talking about shepherdless pie and other winter warmers and with the cold weather having arrived with a vengeance I wanted to join them in making real rib-sticker food. While I love lentils and pulses, the day I made this I really wasn't in the mood for them. This recipe combines the joys of ratatouille and a sweet potato topping.


Ingredients:
1 large onion
2 inches of fresh ginger
1 large courgette
1 large aubergine
4 large mushrooms
4 large tomatoes
half a tube of tomato paste
500g of tomato pasata
2 large sweet potatoes
2 tbsp butter
2 tbsp parmesan
4 tbsp olive oil
boiling water
salt and pepper

Method:


Scrub the sweet potatoes and place them in a hot oven to bake for roughly an hour and a half until soft all the way through.

While the potatoes are baking, chop all the vegetables into cubes and mince the fresh ginger. Place the olive oil in a large pan over a medium heat and saute the onions and ginger until the onions are soft and translucent. Add in the courgettes, fresh tomatoes, aubergine and mushrooms and saute for a further couple of minutes. Pour in the pasata and tomato puree and top up with water until everything is covered. Add in around a teaspoon of salt and pepper and leave to simmer until all of the vegetables are cooked through and then take the lid off, allowing the liquid to reduce to a thick, saucy consistency. You will need to keep a good eye on this and stir it regularly when its reducing to prevent a burnt bottom.
Once the sweet potatoes are baked, allow them to cool slightly so they can be held and then remove the skins. Mash the sweet potato with the butter and salt and pepper to taste.

Place the vegetable mixture in an oven proof dish and top with the mashed sweet potato. Sprinkle with parmesan and more salt and pepper and bake in a medium oven for around 15 minutes until the cheese has melted and the top is golden.

I served mine with green peas, an all-time favourite of mine, but it would also make a fantastic side dish. Perfect for lazy days and days when comfort food is essential, this dish is one to make you smile. Please tag me using #diaryofadefectivehousewife when you make this. Enjoy!


Sunday 12 November 2017

Chocolate Fudge Cupcakes

I made these after loads of requests for chocolate fudge cake from my other half's work and they turned out extremely well. I gave some to a friend who later texted me describing them as 'SEX, WEEEEE!' so they must have been good!


Ingredients:

Cupcakes
175g self raising flour
2 tbsp cocoa powder
1 tsp bicarbonate of soda
150g caster sugar
2 tsbsp golden syrup
2 eggs
150ml sunflower oil
150ml milk

Icing
75g unsalted butter
175g icing sugar
3 tbsp cocoa powder
2 tbsp warm water


Method:

Preheat your oven to 180c. Place your dry ingredients in a large bowl and mix. Gently add in the wet ingredients, stirring thoroughly to incorporate. Place cupcake cases in a muffin tin, I find this saves on explosions and extra mess, and spoon the mixture in. Roughly 2 tbsp of mixture will fit in each case. Bake the cupcakes for roughly 15 minutes until a skewer comes out clean. Take the cupcakes out of the tins and leave to cool on a wire rack.

Once the cupcakes are completely cool, place the butter, icing sugar and cocoa powder in a food processor and whizz, slowly adding the water until you get a thick and pliable mixture. I used a knife to apply the icing to the cupcakes but you could also pipe it on for a more professional finish.  Place kitchen towel under the cupcakes when icing them to catch the drips and save on cleaning after. I added chocolate hearts to mine for a cute finishing touch.

These went down an absolute treat with several requests more already. Please tag me using #diaryofadefectivehousewife when you make these. They really are a must try!


Sunday 5 November 2017

What I Wore.. Winter Wedding Edition

Friends of ours got married yesterday at a gorgeous local hotel and I thought I would share my outfit and how I styled it with the cold November weather. I won't lie, it was a case of stubborn determination to look good over actually being warm although the majority of the time was spent inside so weather wasn't an issue. 

Outfit


When the Ruby Shoo delivery came in at work I just knew I HAD to have the new deep purple Ivy shoes and the matching bag, I love my red ones so much it was a no brainer. So with the shoes and the occasion planned, all I had to do was find an outfit. 

With the shoes being a stunning deep berry shade with touches of mustard and turquoise I originally though to wear a mustard colour dress for an autumnal look. Some late night browsing on ASOS found the dress I went with in a soft grey.

The dress features a wrap fronted lace top with a satin-feel midi length full skirt, a real princess dress. I fell in love the second I tried it on and it fitted perfectly, something that rarely happens for me. For a nod to keeping warm, I found a deeper grey wrap in Gingers, perfect for throwing round my shoulders. 
 
Hair and Makeup 

My amazing friend Fiona has just set up doing make-up and yesterday was her first day so it would have been rude not to support her new venture. She created the most amazing berry toned smoky eye to complement the colour in my outfit and gave me the most flawless, glowing skin ever. Shes a total genius so check out Fee Artistry whenever you need a pick-me-up. 


For my hair I turned to another seriously talented friend. Alexandra Bespoke create gorgeous bridal hair accessories and she made me the perfect hair comb with berry tone lace and grey beading. Alex offered me loads of stunning options to choose from and made my chosen piece incredibly quickly so I was beyond delighted.I kept my hair really simple with a half-up-half-down and placed the comb in the back as my hair had a day of doing its own thing. 


I love any excuse to get dressed up and this helped my push myself out of my comfort zone, as does writing about it! Hopefully this can inspire some outfits. 

Sunday 29 October 2017

My Cure Everything Winter Soup

This soup is a real heart-warmer, ideal for colder days or if you're under the weather. My poor mum has been suffering one of the flu bugs that's on the rounds at the moment so I rustled up a huge vat for her and she loved it. This recipe does have weapon strength amounts of garlic and ginger in which can be reduced if wished but I find it adds warmth and depth to the soup plus I'm pretty sure it'll kill anything going!


Ingredients:

4 medium potatoes
2 medium sweet potatoes
2 large carrots
1 parsnip
1 small swede
2 onions
2 inch fresh ginger
6 cloves of garlic
generous handful of garden peas
2 tsp stock powder (I use bouillon)
water to cover
4 tbsp olive oil

Method:

Find the biggest pan you have, you're going to need it. Chop all the root vegetables into bite sizes pieces, around 2 cm square and set to the side. Place the pan over a medium heat with the olive oil in. Dice the onion and place in the pan when the oil starts to sizzle. Peel the garlic and either use a garlic press or grate into the pan and saute with the onions. I roughly diced the ginger leaving the pieces around 2 mm, but it could also be grated, and add to the onions and garlic.

Saute until the onions are translucent. Add in the root vegetables and gently fry stirring continuously for a couple of minutes. Add the water and stock and leave to simmer for around 20 minutes until the vegetables are soft. Take a potato masher and gently mash the soup to break down some of the vegetables leaving some pieces intact. I find this thickens the soup while offering a really lovely texture. Add in the garden peas and simmer for a further 10 minutes until the peas are cooked through.

Served with a huge slice of crusty bread and far too much butter, this will make anyone feel better. If you give this a try please comment or take a picture and tag me using #diaryofadefectivehousewife

Sunday 22 October 2017

Dairy-Free alternatives

I have been dairy-free for the most part since I was a young teenager due to my 'defectiveness' as my charming other half terms it. Over the years I have had some good, and some bloody awful, dairy free alternatives. A lot of people have contacted me recently asking what I would recommend so I thought I would put it all in one easy to use place. When I became dairy-free there wasn't the same availability of products and they were an awful lot more expensive so I have had the advantage of not eating dairy for a while before introducing the free-from products as I'm sure they taste very different.

Milk


As a milk substitute I tend to use Alpro soy milk although other types of Alpro are equally nice. For me it often depends on whats on offer. I have heard reports of some milks splitting when put into tea or coffee but have not found this an issue myself. My one main issue is that I find it really hard to use an entire carton in the 3 days suggested on the pack. I have used it a couple of days after with no ill effects.

Yoghurt


I really love Alpro's new GO ON pots, a yoghurt topping with fruit underneath. Tescos own brand free from fruit yogurts are also nice along with their chilled free from puddings.

Butter


As a baker, butter is a huge part of my kitchen essentials. I use PURE butters, usually the sunflower or soy depending on availability and have found my cakes are lighter and fluffier without compromising on taste.

Ice Cream 


I love ice cream. Give me a tub and a spoon and leave me to it. My favourites have to be Swedish Glace and Alpro. Booja Booja ice cream is heaven but for me its far more of a treat at the price while the new Ben and Jerry's I found over-rated though pleasant.

Chocolate


For me, Moo-Free chocolate and Tescos own free from are the best for a quick chocolate fix while Booja Booja are the queens of the more luxurious truffles. My Moo-Free  favourite has to be their caramelised hazel nut nibs one which tastes like crunchies. Yum!


Cheese


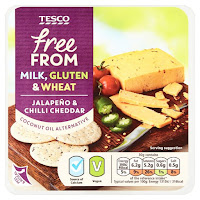
As a vegetarian, cheese was a huge part of my diet so when I had to give it up it was a real blow and the thing I struggled with the most. Violife cheeses in general are fantastic while some of the Tesco free from ones are also good though I would avoid the red Leicester one like the plague, it smells like feet and doesn't taste much better.

I hope this can help some people perhaps going through the same thing I did or just wanting to reduce their dairy consumption. Good luck! 

Saturday 14 October 2017

Mars Bar Crispie cakes

These will always be a firm favourite with adults and kids alike. Incredibly easy to make and quick to put together, these are a great recipe for whipping up. I created my own twist on the classic with a solid chocolate topping and extra mars bar goodness. Who doesn't love something that only has 4 ingredients.  Enjoy!


Ingredients:
120g butter
8 Mars Bars
300g milk chocolate
300g rice crispies

Method:

Grease and line a medium sized baking tray with deep sides. Chop all the Mars Bars into bite sized pieces and sample just to ensure they aren't defective. Melt together 6 mars bars and the butter in a non-stick pan stirring constantly ensuring it doesn't stick or burn.

Once they are melted together and smooth, bit by bit add in the rice crispies stirring well to ensure they are well coated. Spoon the mix into the baking tray and press down firmly with a spoon. Pop in the fridge to cool.

While this sets, melt the chocolate over a low heat until smooth and glossy. Pour over the top of the rice crispie mixture and smooth out using a spatula ensuring to get into all the cracks. Scatter the chunks of Mars bar over the top and leave to cool until the chocolate is fully set. Cut into generous chunks and demolish.

I would love to see your creations, tag me using #diaryofadefectivehousewife 

Sunday 8 October 2017

Apple Crumble Pie

This week autumn has hit with a vengeance and my mum gifted me some of her home-grown apples. For me, the only thing to do was make either apple crumble or apple pie and when I couldn’t decide which, I decided to combine them with perfect success. My other half found them when he came home and ate one straight out the tin making happy noises so I consider these as a winner!


Ingredients:
Filling:
4 apples
1 tsp cinnamon

Crumble:
4oz plain flour
2oz butter
2oz dark brown sugar

Pastry:
4oz plain flour
2oz butter
6 tbsp cold water


Method:

Make the pastry first by rubbing together the butter and flour until the mixture resembles bread crumbs then then slowly add the water mixing gently to bring it together. Wrap the pastry in clingfilm and place in the fridge.

Core and cut the apples into bite sized chunks and place in a pan over a low heat with the cinnamon. You won't need to add any water as the apples will release their juice as they cook and prevent themselves from sticking.

While the apples stew to a soft consistency, rub together the butter and flour for the crumble mixture to a bread crumb consistency and add in the sugar.

Preheat your oven to 180c. Take the pastry and roll it out on a floured surface. I used muffin tins to create mini apple pies but this would work well with one big tin as well. Roll out the pastry to around the thickness of a pound coin and cut to the size of your tin(s). Flour the bottom of the tin(s) and place the pastry inside carefully pushing it down to the base. Add in the apple mixture and pack it down using the back of a spoon. Pop the crumble mixture on top and press down with your fingers to create a seal around the edges.

Bake for around 15 minutes until the crumble topping is golden brown and crisp as this should indicate the base will be too. Allow to cool for a little bit before serving, we ate our first ones straight out the tin and then topped others with custard. Yummy!

Please tag me in your creations using #diaryofadefectivehousewife


Sunday 1 October 2017

Spiced Vegetable Stew

Perfect for the colder weather this lightly spiced vegetable stew is exactly what I crave
come winter. Healthy but hearty and filling, this recipe is perfect for using up leftover veg.


Ingredients:
4 carrots
2 large onions
1/2 head of cauliflower
3 large potatoes
1tsp ginger powder
1 tsp coriander
1 tsp cumin
1tsp mustard seeds
1 tsp paprika 
1 tin chickpeas
1 tin chopped tomatoes
3 cloves garlic, crushed

Method:
Chop all the vegetables into bite sized pieces. In a large pan, put a 2 tbsp of olive oil and place over a medium heat. Add in the spices and gently fry to release the flavour for a minute then add in the onions and garlic, sautéing until translucent.

Add in the vegetables (I added leftovers out the fridge to this basic recipe) and lightly fry in the spice mix. To this, add the tomatoes and chickpeas including the liquid then use the tomato tin for hot water to add in, rinsing the tin at the same time. Simmer over a low heat for at least an hour until the vegetables fall apart at your touch.

I served this with a side of steamed Pak Choi tossed in sesame oil for lunch but it would be equally good with rice or another grain for a more hearty meal. I would love to see your creations, tag me on Instagram using #diaryofadefectivehousewife

Enjoy!


Sunday 24 September 2017

Brownies three ways

When the team at my other half's work asked me for brownies I jumped on the idea. Having never made brownies before it was the perfect challenge and a great opportunity to try something new, although sadly not something I could eat. These went down  fantastically with the team. This weeks offerings are double chocolate brownies, salted caramel brownies and raspberry oreo brownies...


Double Chocolate


Ingredients:

185g butter
185g dark chocolate
85g plain flour
40g cocoa powder
50g white chocolate
50g milk chocolate
3 large eggs
275 caster sugar

Method:

Melt together the butter and dark chocolate, lots of recipes call for a bain marie but for me this is more hassle than its worth and so long as you stir the mix constantly putting it in a pan over a low heat works just fine. Once the butter and chocolate have melted together allow to cool to room temperature.

While the chocolate cools, preheat your oven to 160c fan. Grease and line a 20cm square tin and set aside. Place the eggs the eggs and sugar into a bowl and beat using an electric mixer on high speed until they are thick and creamy. Pour in the melted chocolate and fold in carefully so as not to know the air out of the mix. Add in the cocoa powder and the flour and fold in again. The mix looks weird and dusty to start with but comes together to a fudgy consistency with a little encouragement. Add in the chocolate chunks and mix gently. Pour the mix into the tin, spreading it out using a spatula. Bake for 25 minutes until the middle is solid when wobbled and the top has a papery appearance. Leave to cool in the tin before cutting into chunks and devouring. Keep in an air tight container for up to two weeks (like they last that long!).

Salted Caramel:

Ingredients:

For the brownie:
200g dark chocolate
250g butter
250g caster sugar
3 large eggs
120g plain flour
1/2 tsp baking powder

For the salted caramel:
110g caster sugar
55g butter
4tbsp sour cream
1/2 tsp salt flakes

Method:

Make the salted caramel first by melting the sugar in a nonstick pan over a medium-high heat. Do NOT get the melted sugar on you as the resulting burn is incredibly painful. When the sugar is a deep amber colour, remove from the heat and add in the butter, sour cream and salt, stirring until it all melts together. Pour onto bowl or plate lined with baking paper. and place in the freezer until solid but scoopable like ice-cream.

Preheat your oven to 180c and prepare a 20cm sqaure tin with baking paper. Melt the chocolate in a non stick pan over a low heat, stirring constantly. Use an electric mixer to beat the butter and sugar together until they are light and fluffy then gradually mix in the eggs. Keep mixing once all the eggs are incorporated until the batter has a silky sheen.  Fold in the melted chocolate followed by the flour and baking powder.

Pour the mix into the baking tray, spreading to the edges with a spatula. Scoop out the salted caramel and dot throughout the brownie, if its soft enough take a fork and run it through the mix to trail the caramel through the brownies. Bake for 30 minutes until a skewer comes out sticky but not coated with mixture.

Leave in the tin until cooled before turning out and cutting into chunks and eating.


Raspberry Oreo


Ingredients:

200g dark chocolate
100g milk chocolate
250g butter
300g caster sugar
4 large eggs
175g plain flour
200g fresh raspberries, torn into little bits
154g pack of oreos, cut into rough quarters

Method:

Preheat the oven to 180c and grease and line a 20cm square tin. Melt the chocolates, butter and sugar together over a low heat stirring constantly, Once fully melted, leave to cool to room temperature. Using an electric mixer, beat in the eggs one at a time then add in the flour.

Pour half the mix into the tin then dot with half the raspberries and oreos. Add in the rest of the mix and use a spatula to encourage to the edges of the tin. Top with the rest of the raspberries and oreos and bake for 30 - 40 minutes until a skewer comes out clean. Leave to cool in the tin before turning out and cutting into chunks.

Each of these brownies are reasonably easy to make and totally worth the effort. They will last in air tight containers for around two weeks if you can keep your hands off them. Please take photos when you make these and tag me using #diaryofadefectivehousewife

Enjoy!


Sunday 17 September 2017

Empire Biscuits

Who doesn't love an Empire biscuit, the crumbly goodness sandwiching jam with icing and a jelly sweet on top... PERFECTION. I made these for the first time recently and took them to my other half's work, where the batch of over 50 biscuits lasted less than 2 hours. These biscuits have been voted their favourite bake so far and even better than our local bakers. Super easy, these make a great addition to any gathering and will keep for a few days in an air tight tub, if you can resist them that long. I used a square cutter as I'm in kitchen limbo at the moment and couldn't find my traditional round ones, these were popular though as for those blessed with a more generous gob, they are bite size!

The finish product

Ingredients:

For the biscuits:
230g butter softened
85g icing sugar
340g plain flour

For the topping and filling:
your jam of choice, I used raspberry
230g icing sugar
water
your favourite jelly sweets, I used jelly tots

All sandwiched together waiting for icing in their masses...


Method:

Preheat your oven to 160c and flour a baking sheet. Cream the butter and slowly add in the icing sugar so it doesnt fly everywhere until the mix is light and fluffy. Add in the flour and tip onto a floured surface. Use your hands to bring the dough together to form a smooth ball. I would recommend chilling this in the fridge wrapped in clingfilm for ten minutes to make it easier to cut out.

Roll out the dough on a floured surface using a floured rolling pin to roughly 2mm thick. Dip your chosen cutter in the flour and cut out as many biscuits as possible. Place these on the baking sheet and roll the dough scraps back together and repeat the process until as much of the dough as possible is used. I often roll out the last scraps and have a 'bakers treat biscuit' to munch while I decorate the rest. Try to ensure you cut out an even number but if there is one extra... ooops!

Bake the biscuits for around 15 minutes until golden brown. While the biscuits are still hot, add the jam and sandwich them together taking care not to burn your fingers, I used around half a teaspoon of jam per biscuit but it will depend on their size. Place on a wire rack and leave to cool.

Once the biscuits are cooled, place some sheets of kitchen paper under the wire racks to catch icing drips and save on cleaning. Place the icing sugar in a bowl and gradually add water in small amounts until the sugar comes together into a consistency like double cream. Gently spoon this onto the biscuits and add a sweet or two to the tops to set into the icing.

Super easy to make and even easier to eat, these are sure to be a firm favourite. If you try this recipe please take a picture and tag me using #diaryofadefectivehousewife. ENJOY!

Sunday 10 September 2017

Roasted Mediterranean Vegetables

I love this recipe for lazy days and days when I want something filling but not too heavy. This one is perfect for that subtle taste of summer, and sunny days I'm trying to cling on to now were suddenly somehow in September.  Super easy to make and even tastier, this ones a no brainer...


Ingredients:

1 white onion
1 medium Aubergine
1 large courgette
2 handfuls cherry tomatoes
1 red bell pepper
1 handful fresh basil
1 tsp sea salt
1 tsp black pepper
2 tbsp olive oil


Method:

Chop all of the vegetables to roughly the same size, I started by halving the cherry tomatoes and using them as the base size for everything else. Place the chopped veggies into a roasting tray and mix in the olive oil, salt, pepper and the basil, chopped roughly.

Place in a preheated oven at 180C for around 20 minutes until the veggies start to caramelize on the edges, I served this with couscous cooked to the intructions on the packet, steamed green vegetables and some avocado for lunch. This would make a great recipe for packed lunch, It tastes as good cold as it does warm.

Please take pictures and tag me #diaryofadefectivehousewife if you make any of the recipes

Enjoy!

Sunday 3 September 2017

Millionaires shortbread

This recipe really tested my self control, as a fully confessed spoon-licker the amount of dairy in this made it a real test of my stamina but I made it in one piece! Hotly requested by the team at my other half's work, I was nervous about this as my last attempt ended up as a melting mess but these turned out perfect. Declared excellent by himself's workmates, they had them out my hands and the boxes open quicker than I could say millionaire shortbread. This recipe does take time to make, you need to allow each layer to cool before adding the next one, but is great for days when you have time or can slot it in between all the other chores. Enjoy....


Ingredients:

For the Shortbread

225g plain flour
175g unsalted butter
75g caster sugar

For the Topping

150g unsalted butter
1 can condensed milk (approx 400g)
100g golden syrup
350g chocolate (I used half milk and half dark)
1 tsp vanilla extract 


Method:

Preheat your oven to 150C. Gently rub together the flour and butter until it forms a breadcrumb like texture then add in the sugar. Grease and line a large baking tray with a decent lip (i used an oven tray) and press the shortbread mix in spreading it to the corners. Use the back of a spoon and then your knuckles to ensure the mix is packed down and into the tray. Bake for 20-30 minutes until golden brown. Once baked, set aside to cool. 

While the shortbread is cooling, put the remaining butter in a pan with the golden syrup and condensed milk. Melt these together over a low heat until the butter disappears then increase the heat to bring to a boil. Boil while stirring constantly until the mixture takes on a caramel shade (around 5 minutes). Let this cool and then pour over the shortbread spreading it as you pour to ensure an even coating.

While this cools and sets, take a nonstick pan and over a low heat, melt the chocolate and vanilla extract together, stirring constantly. When the chocolate is mainly melted, turn off the heat and let the remaining warmth do the rest. Check the caramel is set to your touch before pouring on the chocolate , again smoothing as you go to ensure a nice evoen finish. Leave to set at room temperature for at least an hour before cutting into chunks. Don't be tempted to try to set this in the fridge as the chocolate will bloom and make it look strange.

When you make this please take a picture and tag me using #diaryofadefectivehousewife. Happy baking v


Sunday 27 August 2017

What I wore... wedding edition

One of my favourite things on Instagram, YouTube and blogs are what I wore posts. I love to see how other people style outfits and draw inspiration from them so I decided to try it myself. We went to a the evening of a wedding last night and I loved wearing my outfit. Obviously my amazing posing and my other half's incredible photography skills just make this blog but bare with us, we are learning!

Outfit:


I found this dress for an absolute steal on My Kind of Dress, a company based in Ireland that sells utterly gorgeous dresses and seperates perfect for weddings and other events. I found the plunge neckline flattering on my more generous chest while the stretchy fabric helped with actually fitting both my backside and waist in, a daily struggle. This dress also has a cut out detailing on the back, perfectly positioned so I was able to wear my normal bra, a real win in my books.


I paired the dress with my gorgeous red Ivy heels from Ruby Shoo and the matching Brighton bag. The shoes I had purchased from my work and the bag I found on amazon when we were invited to the wedding as I was determined to wear these heels. Surprisingly comfortable, I wore these heels for around 5 hours having worked a full day beforehand, I am very tempted to get these in more colours!


Makeup and Hair:


For my hair and makeup I kept it relatively simple to let my accessories do the talking, My hair is an unruly mop and tends to do as it wishes so I have learnt to just give it a good brush and let it do its thing. I wore my usual base which I am planning a post about soon. For my eyes I used my Naked basics palette from Urban Decay to create a soft smoky eye and packed Space Cowboy glitter by them over the top. I always wear a winged liner, current favourite being Soap and Glory and my lipstick is Red Carpet by Charlotte Tilbury. 

I really loved this look and trying to embrace my figure a bit more, I have struggled with the way I look over the years as most of us  have but my other half thinks I'm 'comfortaboobles' and to me that's all that matters, 

Friday 18 August 2017

Cookies Galore


I recently made the mistake of providing cake for my better half to take to work with him and now a weekly cake run is required. Ideal for testing out new recipes, this weeks donation was highly requested... Chocolate Chip Cookies. That staple love of everyone, big or small.  I decided to try three different variations and see how they went...

Chocolate Chip

Oh-so simple and utterly delicious, the chocolate chip cookie is a lunch box staple. This recipe take about 30 minutes start to finish and makes gorgeous cookies.I used milk and dark chocolate chips in this for added interest but you could easily use white chocolate or all of one type.


Ingredients
200g brown sugar
250g unsalted butter
2 eggs
3 tsp vanilla essence
1 tsp salt
450g self raising flour
200g milk chocolate chips
200g dark chocolate chips

Method
Preheat your oven to 200 fan. Cream together the butter and sugar until the mix is light and fluffy. Add the eggs and vanilla and beat again. Mix in the flour and salt to create a thick dough before folding in the chocolate chips.

Using your hands, create evenly sized balls of dough and press them out to around 1cm thick, placing on a greased baking sheet, Make sure to leave a couple of cm between each cookie to stop them sticking together, Bake for 10 -12 minutes until golden on top. Leave on the try to cool and harden then transfer to a wire rack to finish cooling when firm.


Double Chocolate Chip

More decadent than a simple chocolate chip cookie, the addition of a chocolaty dough makes  these something special as well as being easy to make.


Ingredients
200g brown sugar
250g unsalted butter
2 eggs
3 tsp vailla essence
1 tsp salt
350g self raising flour
150g cocoa powder
200g milk chocolate chips
200g dark chocolate chips

Method
preheat your oven to 200 fan, Mix together the butter and sugar until creamy then add the eggs and vanilla. Carefully add the cocoa powder, flour and salt to for a smooth dough, i found this one slightly less pliable than the chocolate chip cookies, Fold in the chocolate chips, using your hands to encourage them into the dough,

Form balls of the dough between your hands and press out to around 1cm thick. \Place the cookies on a greased baking sheet leaving approximately 2cm between each to prevent them bleeding into eachother. Bake for 10-12 minutes and leave to cool and firm up on the trays to prevent them breaking. Once firm, transfer to a wire rack to cool.

White Chocolate and Raspberry

A sophisticated take on a chocolate chip cookie, I like to pretend the addition of raspberries make these healthy and one of my five a day, if only!

Ingredients 
150g butter
150g caster sugar
2 eggs
250g self raising flour
100g white chocolate chips
150g raspberries

Method
Preheat the oven to 180 fan. Cream together the butter and sugar before adding the eggs, Slowly add the flour to create a dough. Chop the raspberries to similar sized pieced to the chocolate chips and fold both through the dough. this dough is much wetter than the others with the addition of the raspberries.

As with the other cookies, create balls of dough between your hands and gently flatten them to around 1cm thick, Place the cookies on a greased baking sheet and bake for around 15 minutes until golden brown. Leave to cool on the sheets until the cookies have firmed up and then transfer to a wire rack to finish cooling.

Perfect for special occasions or just to keep the biscuit tin topped up, cookies will always be a firm favourite, If you try any of the recipes please tag me using #diaryofadefectivehousewife, I can't wait to see your creations.

Sunday 13 August 2017

My Subscription Boxes

When subscription boxes became popular a a few years ago, i have to admit i thought it was going to be a passing fad and didnt really pay it any attention. I can't remember how I found these but I sure am glad I did. My allergies both inside and out make me what my other half calls 'defective' and a vegan inspired diet covers me pretty well so finding a boxes of goodies that come and I can happily use most things has been an absolute delight. The company is also based in Glasgow and aims to promote and support British business catering for alternative diets, They also have an online shop with more options that you can even comprehend for vegans and omnis alike. 

The Vegan Kind Beauty Box


Coming in at £18.15 and arriving once every three months,this box of goodies is one I always looks forward to, As a skincare and makeup junkie its great fun to try new products and these tend to suit my skin perfectly. The selection is fantastic with masks and moisturisers and hair care galore. This months haul included a sachet of brace. Organically shampoo, a rollerball bottle of tossed and happy aromatherapy oils which smells amazing and a zenreaau waterless towel off body wash. Along with that came a bottle of Eden perfume, a chirp oil based hair mask and a huge tub of HA hydra active cream for fave and body. All for less that £20, mental! Some of my new skincare and body favourites have been from these boxes and they certainly don't scrimp on the contents. The box also comes with a breakdown of all the products and the companies that supply them, along with the costs which often adds up to well over £50 plus information about the charity of the month. 

The Vegan Kind Food Box 


I get so excited every month when I know this should be arriving it's actually sad. The amount of goodies included is always incredible and there has been very little that I haven't demolished pretty much as soon as I open the box. While the products are vegan it should be noted that a lot of them do contain nuts but some are branded gluten and nut free as well. Often the foodie box contains a little beauty treat as well as the food, this months being an activated charcoal deodorant balm from Native Unearthed. This months. Of included a bag of sweet peach Candy Kittens which are firm favourites with e and my omni SO so a great treat. Also in the box was a strawberry blonde bar which lasted all of 30 seconds out the box (I had barely taken the pictures before it disappeared), a tub of Sweet Freedom chocolate spread which gives Nutella a a serious run for its money, a We Are Tea sample tea bah of their Super Berry tea which went into my handbag to replace my emergency teabag I already used. Along with all this there was an bah of beg crisps from Emily and a PhD Protien Superfood smoothie in a pouch perfect for on the go. This box comes with a recipe card which is always for something beyond delicious and a breakdown of the goodies in the box. Coming in at £13.15 including postage this is crazy good. 

These boxes have been brilliant for me. When I developed my ltwsf allergies around ten years ago I kind of gave up on food, if it hated me then why should I love it but between a family of avid cooks and goodies and these boxes of goodies I have got my love for food back. To sign up for the boxes or just have a nosey at the online shop go to  https://www.thevegankind.com/?gclid=CjwKCAjwzrrMBRByEiwArXcw2zp5-hJ_ObmB9pdq47D5zwukaoAlkV4TrO4fXASyDxgVGWbxWGdGoBoCCqIQAvD_BwE 


Sunday 6 August 2017

Lime and Ginger Drizzle Cake


This is my twist on the first cake I ever made by myself, a classic victoria sponge. I have taken the basic recipe and jazzed it up with the addition of ginger and lime for a fresh and zingy cake that is so light its perfection. Easy to make and even easier to enjoy, this is one to bake time and time again...

Ingredients:

6oz self raising flour
6 oz caster sugar
6oz butter
3 eggs
1tsp baking powder
5 balls of stem ginger in syrup and half the jar of syrup
3 limes, zest and juice


The cake before and after drizzling

Method:
Preheat your oven to 180 degrees fan, Place the ginger balls in a food processor and blitz down to fine shards. Zest the limes and place the zest and ginger in a bowl. In the food processor, place the sugar, flour, butter and baking powder and blend on low, adding the eggs slowly. add in the ginger and lime and mix thoroughly on high to create a batter-like mix.

Place the batter in a large cake tin and bake for 15-20 minutes until the cake is golden brown and when pierced with a skewer it comes away clean. When baked, the cake should be gently pulling away from the sides of the tin. Let the cake cool for ten minutes while you prepare the drizzle. Add the jiuce of the three limes to the ginger syrup and stir thoroughly. take a fork and prick the cake all over right to the base. Gently spoon over the drizzle making sure to cover the whole cake.

Leave the cake to cool completely and using a spatula tease the edges away from the tin. Holding the sides of the tin gently shake the tin up and down, turning every few shakes to release the cake. Slide out onto a cooling rack to settle.

Cut into generous chunks and enjoy...